How to install a JDBC driver in JBuilder 5?
Add the driver to JBuilder
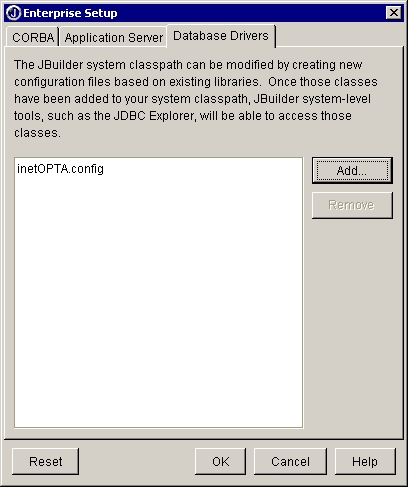
Open JBuilder and choose “Tools | Enterprise Setup”. Click the Database Drivers tab which displays *.config files for all the currently known database drivers.
Click Add to add a new driver, then New to create a new library file for the driver. The library file is used to add the driver to the required libraries list for projects.
Note: You can also create a new library under “Tools | Configure Libraries”, but since you would then have to use Enterprise Setup to derive the *.config file, it is simpler to do it all here.
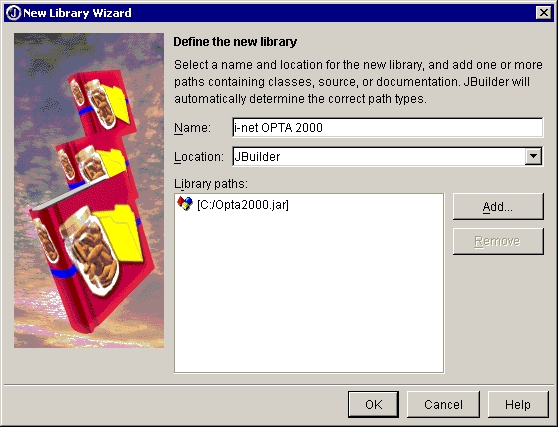
Type a name and select a location for the new file in the Create New Library dialog box.
Click Add, and browse to the location of the driver jar file Opta.jar. You can select the directory containing the driver and all it's support files, or you can select just the archive file for the driver. Either will work. JBuilder will extract the information it needs.

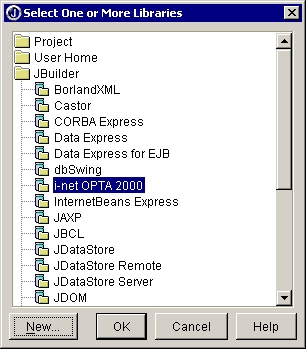
Click OK to close the file browser. This displays the new library at the bottom of the library list and selects it.
Click OK. JBuilder creates a new .library file in the JBuilder /lib directory with the name you specified (for example, InterClient.library). It also returns you to the Database Drivers page which displays the name of the corresponding *.config file in the list which will be derived from the library file (for example, InterClient.config).

Select the new .config file in the database driver list and click OK. This places the *.config file in the JBuilder /lib/ext directory.

Close and restart JBuilder so the changes to the database drivers will take effect, and the new driver will be put on the JBuilder class path.
Using the Database Pilot
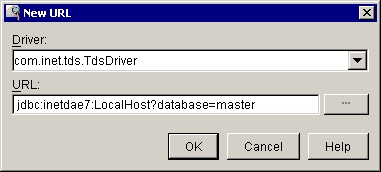
After you have add the driver to JBuilder you can use the Database Pilot. You need to add a new URL.

Add the driver to the project
Projects run from within JBuilder use only the class path defined for that project. Therefore, to make sure the JDBC driver is available for all new projects that will need it, define the library and add it to your default list of required libraries. This is done from within JBuilder using the following steps:
Start JBuilder and close any open projects.
Choose “Project | Default Project Properties”.
Select the Required Libraries tab on the Paths page, then click the Add button.
Select the JDBC driver from the library list (for example i-net OPTA ) and click OK.
Click OK to close the Default Project Properties dialog box.


